
This page best viewed with

A Book By CM. Click To Get A Copy

OnePlusYou Quizzes and Widgets
Created by OnePlusYou

No Rights Reserved. Take Anything You Want, But If You Steal Any Text Link To Here.

Send Your Hate Mail To

........

Greed:High
 
Gluttony:High
 
Wrath:Low
 
Sloth:Very High
 
Envy:Low
 
Lust:High
 
Pride:High
 

Take the Seven Deadly Sins Quiz

King Gambrinus - Patron Saint of beer.

Sunday, April 27, 2008

Project Photos

It is time. For photos of the latest project. From start to finish.

First I had to go to the place of curse, and get the raw materials. Which consisted of wooden poles. Like this.
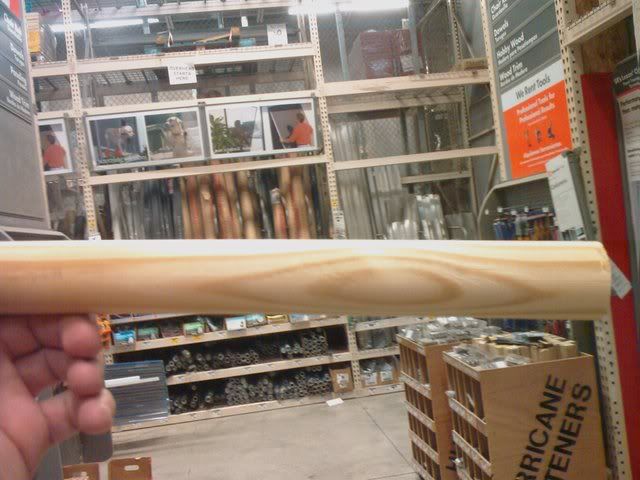
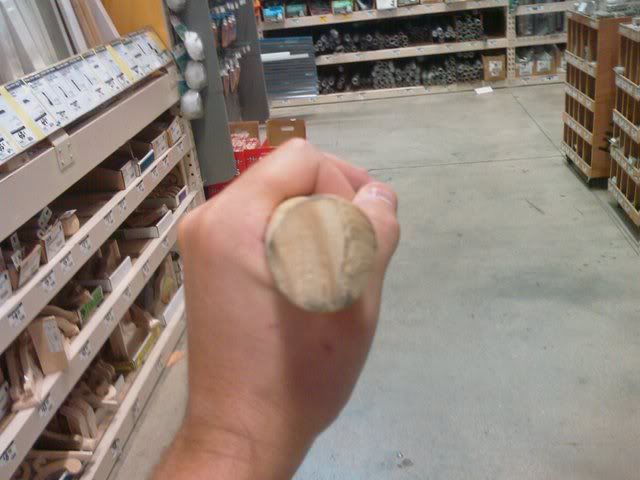

This is the raw material. Plain old boring pine poles. Now I could have just used them like they were. But as someone once said in a comment here "nothing finishes a project like paint". Or something.

But I did not want to use paint. I thought that some wood stain would look better. Plus stain is easier to use. You gop the stuff on. No need to worry about brush strokes or over application. Just slop it on there! Let it sit for a few minutes (15 max) then wipe it off with a rag. The rag removes excess stain, and what is left is only the stuff that soaked into the wood.
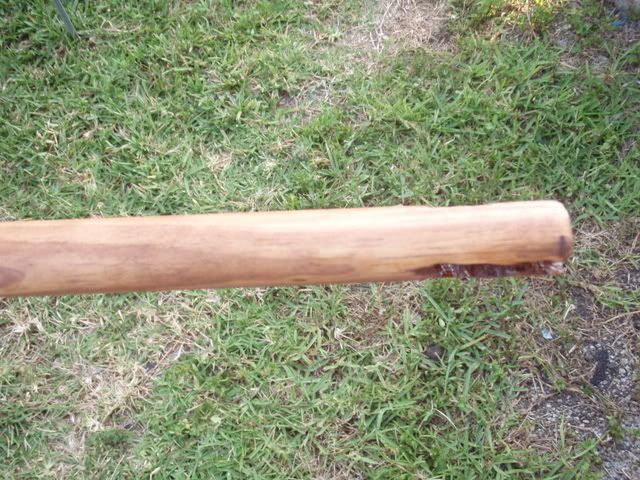

Here is the pole, sanded and stained. I also cut the notch in the bottom of the pole, which you can sort of see. The notch is important because it keeps the pole from turning in the rod holder.

But you can not just stain something and call it done! Oh no. You have to apply clear varnish over the stain! It seals the wood and makes it all shiny any stuff. So you have to apply one coat, let it dry, lightly sand the finish with very fine grit sandpaper, then apply another coat. Repeat as desired. Three coats is probably enough, but I went with 4 or 5.
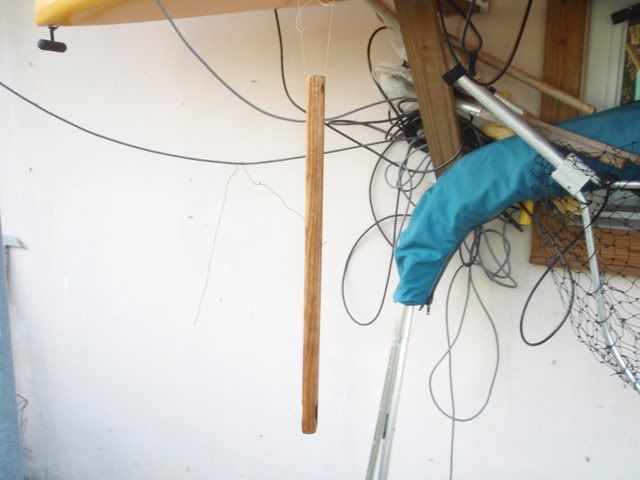
Here you can see a staff hanging from my fancy high tech drying apparatus. Notice how it is sort of shiny? Well that is wet varnish. But the pole is hanging outside and dries quickly. I used heavy fishing line and the kayak wall mount thing to make the fancy drying apparatus.
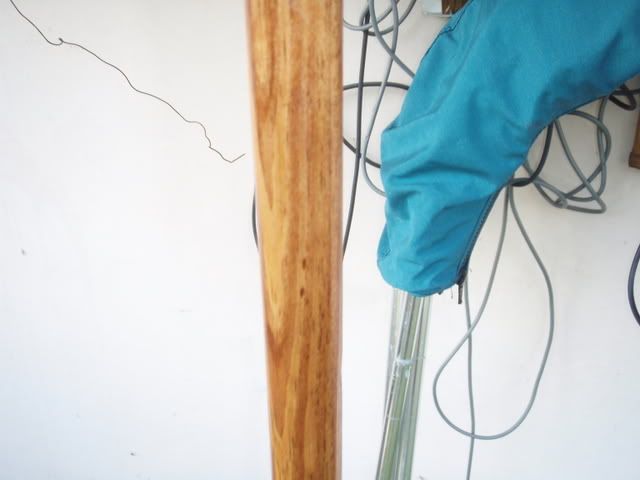
Now this is more like it! The close up shot reveals the staff in more detail. See how nice the stain looks? You can still see the wood grain. Paint covers up the grain. But this is still drying.

And now, the finished product. This is not the same staff as the one in the above photos, but it was done with the same steps.
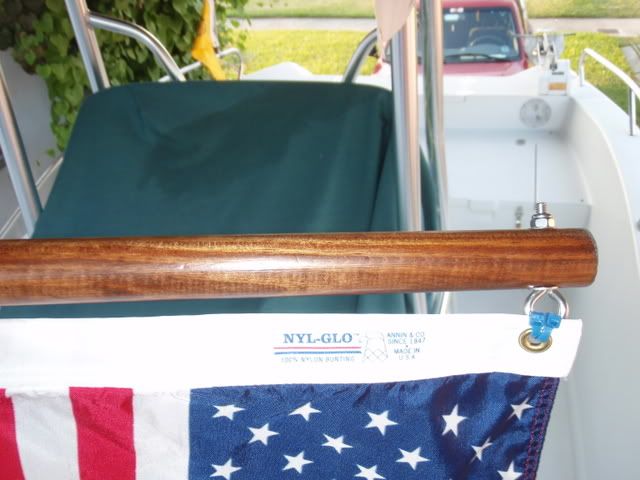
Now this is starting to look finished! You can see the stainless steel eye bolt, and my fancy high tech flag attachment method. Cable ties. MUCH nicer than plain unfinished wood!!
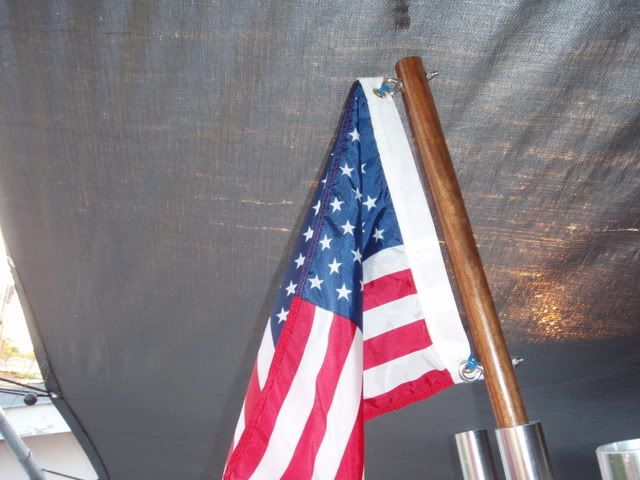

The end result. From a plain boring pine pole, to a drilled notched stained varnished boat flag staff.

And they want $50 for a boring aluminum pole flag staff. HA! That wood was $1.30 a foot. Each staff is two feet. So that is a whole whopping $2.60. The stainless hardware was three or four bucks. So that is what - $6.60? The stain and varnish were $3.50 each - but I do not need an entire can for one staff. So lets figure I used 50 cents of stain and varnish. Up to $7.10! So I have less than $10 locked up in each staff.

Now - if I can just manage to not have these fly out of the boat when it is being towed home........

Labels:

Thursday, November 08, 2007

Man DNA

I figured out what I am going to do with the 12 gallon cube aquarium I got.

Take it apart. There is a false back for it, that hides 4 chambers from view. Chamber 1 is supposed to have this sponge in it, chamber 2 is for ceramic beads and carbon (the beads give a place for bacteria to live, the carbon removes stuff dissolved in the water), chamber 3 is for plastic "Bio Balls" which give bacteria another place to live and remove any air bubbles that may be in the water. Chamber 4 is for the return pump.

So the idea is to remove the false back so I can get to all 4 chambers. Then I can reconfigure it all to make things more to my liking. Fun fun fun. At least I think so.

Now there are two possible outcomes to this project idea. What are these possibilities? I am glad you asked. And if you did not ask - PPPBBBBBTTTTTT! You are going to find out anyway.

See guys need to tinker with stuff. It does not matter what it is. Lets take the Toyota truck I have. It was fine was it was off the lot. But I had to tinker with it. So I got truck bed rails, and a toolbox. And a towing hitch. And the K&N washable air filter.

THIS JUST IN! I just saw the first Christmas commercial this year. It was for Garmin. Giva giva giva giva Garmin.

OK so where was I? Oh yea, the tinkering. I actually did not tinker with the truck very much. I kind of forgot about my project to install some extra driving lights. OH YEA and I did add a pair of 55 watt (each) reverse lights. Those are sweet. 110 watts of reverse light power - plus the factory lights. OH YEA!

I did far more tinkering with the boat. Lets see here. I added:

1. Official galvanized John Deer beer bottle opener
2. Wash Down pump
3. GPS plotter / VHF radio / fish finder on the boat "dash board".
4. FM stereo and 4 new speakers
5. Replaced the bilge pumps and got new float switches
6. Replaced the trailer winch with a better one
7. Other things I might have forgotten about.

Somewhere, buried deep in my man DNA, there is the need to tinker with things - in a feeble attempt to make them better.

This is why I feel compelled to take this item, which a lot of people would think is just fine the way it is now, and disassemble it. Then change it. Then put it back together.

Now for the two possible outcomes!

Outcome number one is.....SUCCESS! Total and complete success. The modifications will work out just as I planned, and the end result will be an item customized to what I think I want.

Outcome number 2 is.....I make things worse! This happens. Something breaks and can not be repaired. Or I get something apart and can not get it back together again. Or I get something apart, realize I can not really do what I was planning to do, and then reassemble it - killing whatever warranty the item had.

But yet, I feel the need.

Because somewhere, buried deep in my DNA, is a gene that creates a protein that compels me to break things, then try to fix them again.

I just wish that something in the aquarium required a welder to modify. My dad has a new welder that I can always borrow. The welder does not get used very much - but it is something one should have at hand in case you need it. The drill press and the two chop saws (one for metal one for wood) are also not used very much - but again handy things to have around in case you ever need to drill or chop saw anything.

And then there is the most destructive tool of them all - the SAWS ALL! That thing is crazy. My dad and I used it to cut up an old fiberglass 14 foot boat into sections that fit in the bed of the truck so that I could haul the sections off to the dump. The whole boat was too big to take to the "house hold waste" dump, and taking it to the landfill would result in at least a $500 disposal fee. But by chopping it up, it was free to get rid of. The dump attendant accused me of dumping "a boat" but I argued and said that it was in fact a "boat shaped flower planter". My point was that if it does not float - it is not a boat. And clearly the pieces of the "boat shaped flower planter" would not float.

And somewhere - buried deep in the garage - is an oxygen/acetylene cutting touch. If I ever find that thing I will probably set something on fire. That is another tool of mass destruction.

With these tools of mass destruction handy - I can either break anything, fix anything, build something that works, or build something that does not work.

But I will not need any of these things, only a knife and the Dremel. The Dremel tool rules.

Labels: , , ,

Saturday, January 27, 2007

Finished Project

So some of you may be wondering what my bike stand project looks like. Well guess what? I remembered I have a digital camera! So there will be pictures.

I used 3/4 inch galvanized "nipple pipe", which is available at anyplace that sells plumbing supplies. The nipple pipe is threaded on both ends, and all the T and elbow fittings are also threaded, so everything uses screw together technology. Pretty simple stuff really.


This is the stand, in all its glory. Notice how it is painted red. Also notice the 2x4 planks, which were cut with the CHOP SAW! I love that thing. It makes chopping wood planks as easy as cutting butter. Truly, the man who invented the chop saw needs a holiday named after him


This is the top of the stand. Notice how it is also painted red. The black is electrical tape over this silicone mat thing from the kitchen crap section of Target. I cut sections of the mat to size, then wrapped it all up in electrical tape. This keeps the bike from getting scratched. So far it works. No new scratches.


And here is the stand doing its job. Holding the bike. The thing is stable as can be. In case you are wondering, it is attached to the 2x4 planks with pipe clamps and 8 nails.

Behold my works! Marvel at my engineering skills! Envy the snazzy red paint job!

I think the project is finished. Almost. I may paint the wood white. That would look bad ass.

Labels:

Thursday, January 25, 2007

Storage Solution

I have had a storage problem for over a year now. You see, I bought a nice bicycle last December. It has an aluminum frame, front and rear disk brakes, indexed shifting, and stuff. I spent a decent amount on it - something like $550. A lot for a bicycle? Not really. It is on the low price scale for a high end bike. As opposed to a high price cheap bike. The next step up was almost $800.

Anyhow, for all that money there is no kick stand. Those are not manly. If you have a kick stand on your bike, other people will laugh at you. Kick stands are for cheap, low end, department store bikes.

Funny how that works huh? The less you spend on a bike, the MORE things it comes with to keep it from falling over and getting scratched. So I do not have a kick stand. And I do not want to go into the fancy bike store with the $5,000 carbon fiber super bikes (yes you still have to peddle them yourself) and ask for a non manly kick stand!

So I have been storing the bike by leaning it against stuff. There is a small storage room thing in the house that I use for this. There is a lot of crap in there to lean a bike against. What the hell is in all those boxes? I forget. It must be crap nobody needs, because nobody has gone looking through any of the boxes for anything in a long time. So if you are missing something and you can not find it - it may be in a mystery box here! Who knows!

Anyway, what I needed was a better system. Some sort of stand! A stand that supports the bike with the tires off the ground, so that I can make adjustments and stuff to it. Yea. That is what I need. A stand! A manly stand! Not some wimpy girlie non-manly kick stand thing! A storage stand that is also a repair stand, so that I can start to break stuff on the bike while trying to adjust/repair/maintain it.

So I made one. Out of 3/4 inch galvanized steel plumbing pipe. It uses screw together technology. It is strong as hell. And it only cost around $30 to construct. In theory it can be taken apart for easy transportation. It is pretty cool. I have to post photos of it sometime.

I am fairly happy with the end result. No more leaning!

Let the destruction begin!

Labels: , , , ,